First Time Using a Perler Bead Generator: Turning This Cat Into a 40-Grid Pattern
You already have an image you like and want to turn it into a Perler bead pattern. You can start by opening Master the Pixel Perler bead generator. Below, we'll use this little cat wearing a green scarf to make a small pattern: keep the ears, tail, scarf, and both eyes, and allow the fine pattern on the scarf to be simplified.
The final version kept is 40×40 grids, 580 beads, 21 colors. The pattern with color codes is at the end of the article and can be downloaded directly.
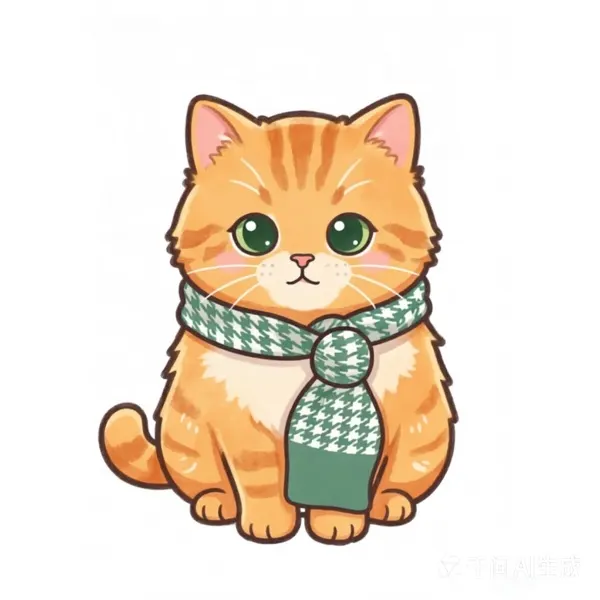
The images and data follow the original manuscript's example and are used to explain the trade-offs in size, color reduction, and grid-by-grid edits; they do not represent Master the Pixel's actual generation results.
First generate a version and see what the image becomes
Upload the image and keep the full picture in the crop box. To compare with this example, first use this group of settings: mode set to "Speed", width set to 40, palette set to "MARD 291"; turn on "Remove background color" and temporarily turn off "Merge scattered color codes". These parameters correspond to the existing example in this article; the actual available settings are subject to the image-to-bead pattern converter.
In this example, I did not crop off the white border first, nor did I additionally adjust brightness or contrast. The generated result is 40×40 grids, of which 1020 grids are empty, and the cat itself uses 580 beads. Here, 40×40 is the canvas range; after the white background is cleared, you do not need to fill all 1600 positions.
At first glance, the cat's outline is still there, and the scarf is recognizable. However, the things that made it look refined in the original image—the highlights in the eyes, the thin lines around the mouth, the small patterns on the scarf—have already been squeezed into very few grids.
At this point, first decide how much of this image you want to preserve, and then continue adjusting colors.
For this cat, I keep 40 grids
I also generated a 70-grid version of the same image with the other conditions kept the same. Putting the two images together, the difference is clearer than looking at the parameters alone.
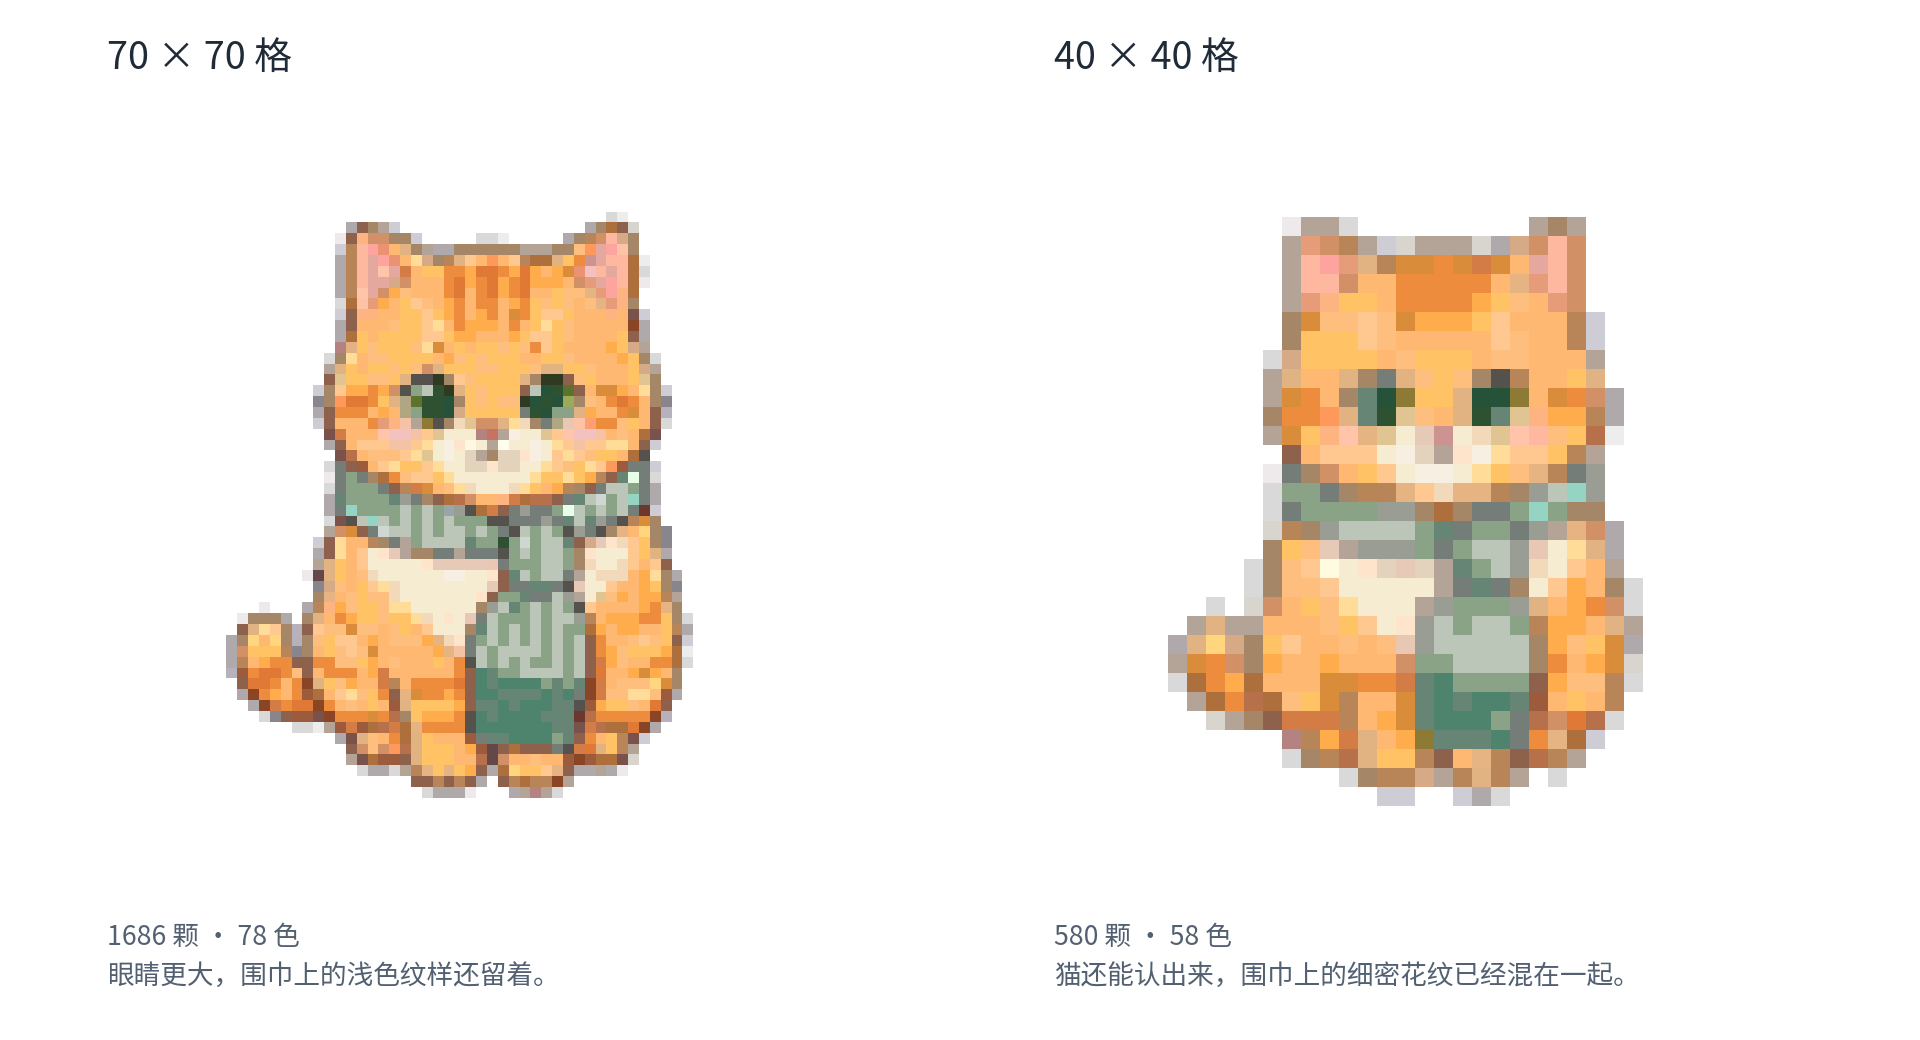
In the 70-grid version, the eyes are larger, and more of the light-colored pattern on the scarf is retained. The cost is that bead usage increases from 580 to 1686, 1106 more beads.
For this small pattern, I accept that the scarf becomes simplified green blocks. Its knot and hanging shape are still there, enough for people to see that this is a cat wearing a scarf. I keep the size at 40 grids, and next I will make the eyes clear.
This choice will lose the original image's delicacy. Especially the scarf—it is already impossible to fully retain its original pattern in this 40-grid pattern. After seeing both versions and then accepting this loss, there is no need to keep changing the size back and forth later.
The image got smaller, but the colors did not decrease much
The 40-grid version has only 580 beads, yet it still uses 58 colors. Among them, 38 colors each have no more than 10 beads.
Looking only at the thumbnail, you would think it is mainly orange, green, plus some light and dark variation. Only after opening the color list do you find that those subtle variations have been divided into many color codes. Distinguishing 58 colors for one small cat is somewhat cumbersome.
Next, only adjust "Merge scattered color codes", keeping the image, size, mode, and palette unchanged. The results obtained this time are as follows:
| Processing method | Number of colors | Bead usage |
|---|---|---|
| No merging | 58 colors | 580 beads |
| Merge threshold 0.5% | 42 colors | 580 beads |
| Merge threshold 2% | 20 colors | 580 beads |
In the 20-color version, the large orange areas of the body and the scarf are still there, and the list is much shorter. But when you zoom in on the face, you will see a change that cannot be ignored: the dark green in both eyes has been merged away and turned into gray-green blocks.
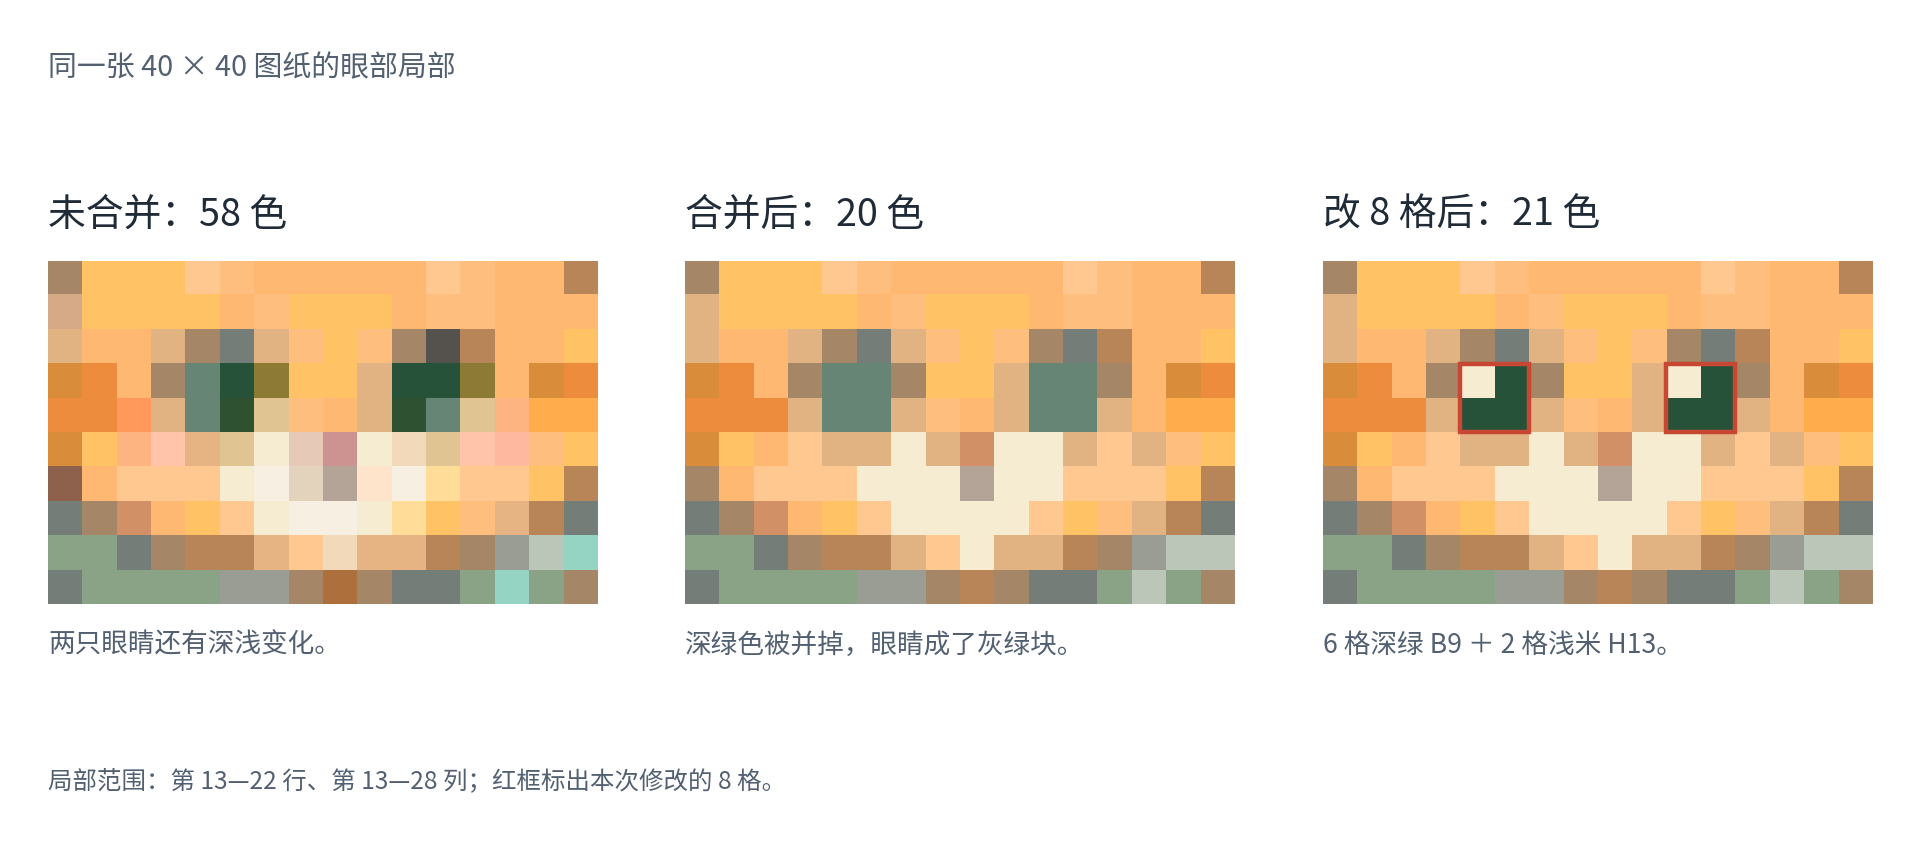
Among the merged colors, some are just very subtle differences between oranges, but some fall on the eyes. Processing them together by usage cannot preserve all the details worth keeping in this image.
I keep the body and scarf of the 20-color version and edit the eyes separately.
The 8 grids where the eyes are located, recolor them separately
Look at the red boxes on the right side of the image above; the core of each eye is a 2×2 small block.
Change the upper-left grid to light beige H13, and the other three grids to dark green B9. Do the same for both eyes, and you get dark eyes with a bit of highlight.
If you directly edit the pattern attached to this article, the left eye is at rows 16–17, columns 17–18; the right eye is at rows 16–17, columns 23–24. The coordinates correspond only to this file.
When editing grid by grid, after selecting the color, adjust only the corresponding position. Here, the edit needs to be limited to the eyes: after merging, the eyes and the scarf both use P15, and replacing the entire color code would change the scarf as well. bead pattern generation and editing tool
This time, 8 grids were changed in total. H13 was already in the pattern, and only one new color, dark green B9, was added, using 6 beads. Thus, the number of colors goes from 20 to 21, and bead usage remains 580.
These 6 dark green beads are worth keeping. Their usage is very small, but they can distinguish the eyes from the other color blocks on the face; saving them just to reduce the color count by one more would make this cat lose its expression.
Save this edited version
After the eyes are edited, export a PNG that retains each grid's color code and row/column coordinates. When placing beads, you can then locate "which row, which column, which color code". Leave blank positions in the pattern empty, and place beads at positions with color codes according to the labels.
The final version in this article has been saved, and the materials list has also been recalculated according to the recolored grids. In the list, B9 is 6 beads, H13 is 34 beads, for a total of 580 beads.
Example note: The images, color codes, quantities, and coordinates follow the original manuscript's example. The product entry is uniformly Master the Pixel, and the current workspace should be used as the standard when using it. This article has not been verified by physical bead assembly.
Author:AIRouter
Link:https://www.airouter.me/blog/bead-generator
Non-commercial reuse with attribution (CC BY-NC-SA 4.0).